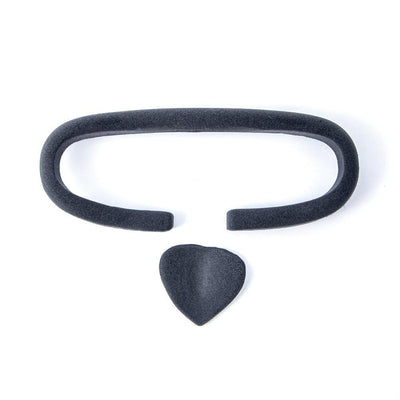
Lanxiang soft foam face pads cushion the contact area of compatible FPV goggles and help close gaps around the face. The shaped opening follows the eyepieces and nose recess. Choose a 10 mm thin pad, a 14 mm thick pad, a three-piece set, or a separate hook-side mounting ring.
Designed for FatShark HDO2, with installation examples also shown on FatShark HDO and SKY02, SKY03 and SKY04 goggles. Check the faceplate outline and attachment surface on your goggles before fitting. Goggles are sold separately.
Features
Soft, skin-contact foam forms a cushion around the eyepiece opening and nose area.
Two nominal thicknesses provide different cushioning profiles. The 10 mm pad has a lower profile, while the 14 mm pad adds more foam depth.
A separate shaped hook-side ring provides the mounting interface. Three-piece sets include the ring with both pad thicknesses.
Black and red options are available as individual pads or sets. Photos of green foam are retained for fit and package reference only.
Specifications
Product
Shaped foam face pad / hook-side mounting ring for FPV goggles
Maker
Lanxiang
Foam material
Soft skin-contact foam
Thin pad
10 mm nominal thickness
Thick pad
14 mm nominal thickness
Primary fit
FatShark HDO2
Other illustrated fits
FatShark HDO, SKY02, SKY03 and SKY04. Confirm faceplate shape and attachment before installation.
Available foam colors
Black and red. Green is currently unavailable.
Attachment
Shaped hook-side ring, included in sets and sold separately
Fitting and care
Align the pad and mounting ring carefully before pressing them together. Avoid forceful pulling, stretching, repeated peeling and reattachment, or soaking in water, as these can cause the adhesive layers to separate. Actual color may differ slightly from photographs.
What's Included
Selected package
Contents
Black or red three-piece set
1 × 10 mm foam pad, 1 × 14 mm foam pad, 1 × black hook-side mounting ring
Black or red 10 mm single pad
1 × thin foam pad. Hook-side ring is sold separately.
Black or red 14 mm single pad
1 × thick foam pad. Hook-side ring is sold separately.
Hook-side ring only
1 × shaped hook-side mounting ring. Foam pads are sold separately.
The pictured goggles and straps are demonstration equipment and are not included.
Applications
Replacing worn foam on a matching FPV goggle faceplate.
Comparing thin and thick padding to adjust face-contact comfort and reduce gaps.
Replacing the hook-side mounting ring when fitting a foam pad.
FAQ
Does a single foam pad include the hook-side ring? Single 10 mm and 14 mm pads are supplied without the hook-side ring. Choose a three-piece set or add the separately sold ring if you need it.
What is the difference between the thin and thick pads? The thin pad is nominally 10 mm and the thick pad is nominally 14 mm. A three-piece set includes both thicknesses in the selected color.
Are the goggles in the installation photos included? The listing supplies the selected foam pad package or mounting ring. You need your own compatible goggles.
How should I fit and care for the foam? Align it before pressing the attachment surfaces together. Avoid stretching, repeated removal and soaking to help preserve the adhesive layers.
Visual Details
Black and red sets each pair a thin pad with a thick pad and a separate hook-side mounting ring. Choose the color and package in the selector.The black three-piece set contains one 10 mm pad, one 14 mm pad and one hook-side ring. The ring is the narrow piece at the top.The red set includes two red foam pads and a black hook-side ring. The two pad thicknesses let you compare the fit on your own goggles.The caliper view compares the edge thickness of the red foam. Use the selected 10 mm or 14 mm option as the nominal size.The black foam is shown edge-on at the caliper jaws. Its compressible structure means pressure can change a thickness reading.This second black-pad measurement view retains the jaw position and the foam edge for comparing the profiles.The thinner red pad is shown edge-on beside the caliper. The thin option is nominally 10 mm.The green installation example shows the pad surrounding both eyepieces and the nose opening. Green packages are currently unavailable.The upper view of the green installation shows how the pad follows the curved faceplate. Goggles are pictured for fit reference and are supplied separately.The lower view of the green installation preserves the nose contour and the faceplate edges. Select a currently available black or red package.On the SKY04 example, the black 14 mm pad surrounds the eyepiece opening with its thicker face-contact edge.This upper SKY04 view shows the black 14 mm pad following the curve across the faceplate.The lower SKY04 view shows the 14 mm pad around the nose recess and alongside the underside controls.The angled SKY04 view keeps the 14 mm pad edge visible along the side of the goggles.On HDO2 goggles, the black 14 mm pad follows the lower faceplate and nose cutout. Align the pad before pressing the attachment surfaces together.The red 10 mm pad is shown from the eyepiece side of HDO2 goggles. The goggles and strap are demonstration equipment.This upper HDO2 view shows the black 14 mm foam standing above the faceplate edge.The HDO2 eyepiece view shows the black 14 mm pad and its nose opening. Choose thickness according to the fit you need.This angled HDO2 view preserves the 14 mm black pad profile around both eyepieces.The upper HDO2 example uses the red 14 mm pad. The pad follows the existing faceplate curve.The underside HDO2 example shows the red 14 mm foam and the black attachment layer beneath it.The red 14 mm HDO2 installation is shown from the eyepiece side so you can compare the opening with the thin version.The red 10 mm HDO2 pad follows the upper faceplate with a lower profile than the 14 mm option.This lower HDO2 view shows the red 10 mm pad along the nose recess and outer faceplate edges.The HDO installation example shows a black 10 mm pad around the rectangular eyepieces.This upper HDO view shows the red 14 mm pad and the curve across the forehead area.The red 14 mm pad is shown from the eyepiece side of HDO goggles, retaining the complete nose opening.The underside HDO view keeps the red 14 mm foam edge and faceplate contour visible together.The upper HDO comparison uses the red 10 mm pad. Thickness selection changes the cushioning profile.This lower HDO example shows the red 10 mm pad following the nose recess.The HDO eyepiece-side example uses a red 10 mm pad. The foam is sold separately from the goggles.The upper HDO view shows the black 14 mm pad. Keep the mounting layer aligned before attaching it.The black 14 mm HDO pad is shown around both eyepieces to make the complete outline visible.This underside HDO view shows the black 14 mm pad sitting along the faceplate edge.The angled lower HDO view uses a black 10 mm pad, showing the thinner profile at the nose recess.The black 14 mm HDO pad is shown from above, with the central faceplate curve retained for reference.On the SKY02 example, the red 10 mm pad follows the upper faceplate beneath the control area.The red 10 mm SKY02 pad is shown from the eyepiece side. The nose cutout stays open between the two viewing areas.This lower SKY02 view shows the red 10 mm pad meeting the curved edge around the nose.The upper SKY02 example uses the red 14 mm pad for a thicker cushioning profile.The lower SKY02 view shows the red 14 mm foam edge and its attachment layer.This eyepiece-side SKY02 view shows the red 14 mm pad and its full face-contact outline.The black 10 mm pad is shown along the underside of SKY02 goggles. The surrounding controls remain visible for orientation.The upper SKY02 example uses the black 14 mm pad, showing the thicker edge against the white housing.The black 14 mm SKY02 pad surrounds the eyepiece area. The red material behind the opening belongs to the demonstration setup.This second upper SKY02 angle retains the black 14 mm pad and the contour across the faceplate.The angled lower SKY02 view shows the black 14 mm foam following both sides of the nose recess.The SKY02 eyepiece-side view keeps the complete black 14 mm pad opening visible.On SKY03 goggles, the black 14 mm pad is shown from above with its thicker face-contact edge.The lower SKY03 view shows how the black 14 mm pad follows the curved housing around the nose.The black 14 mm SKY03 pad is shown around the eyepieces for an unobstructed view of its outline.The upper SKY03 example uses the black 10 mm pad. Compare its profile with the 14 mm installation views.The black 10 mm SKY03 pad follows the lower faceplate. Avoid stretching the foam during fitting.This eyepiece-side SKY03 view shows the black 10 mm pad and the nose opening together.The upper SKY03 example shows the red 14 mm pad curving across the faceplate.The red 10 mm SKY03 pad is shown from the eyepiece side. The selected package determines whether a mounting ring is included.This lower SKY03 view shows the red 10 mm foam and the black attachment layer underneath.The underside SKY03 example uses the red 14 mm pad, keeping the thicker edge visible along the curve.The upper SKY03 view shows the red 10 mm pad around the faceplate. Align the full outline before pressing it into place.The red 14 mm SKY03 pad is shown from the eyepiece side, with the nose cutout and both viewing areas visible.On the SKY04 example, the red 10 mm pad follows the top edge of the white faceplate.The lower SKY04 view shows the red 10 mm foam meeting the faceplate around the nose.The red 14 mm SKY04 pad is shown from the eyepiece side, retaining its full face-contact outline.This closer eyepiece-side SKY04 view shows the red 14 mm pad sitting around both viewing areas.The upper SKY04 example uses the red 10 mm pad. Goggles and the fitted strap are demonstration equipment.The red 14 mm SKY04 pad is shown from below, preserving its position relative to the underside controls.The eyepiece-side SKY04 example uses the red 10 mm pad. Compare the lower profile with the thick-pad examples.The upper SKY04 view shows the black 10 mm pad following the same faceplate curve.The lower SKY04 example shows the black 10 mm pad around the nose recess and outer edges.The green set is retained as a package reference, showing two foam pieces and one hook-side ring. Green options are currently unavailable.The green foam example shows its outline before the inner insert is removed. This color is currently unavailable.